EmDash is a content management system that runs inside an Astro website. Its admin lets you write posts, upload media and manage navigation through a browser. EmDash 1.1.0 adds a publishing calendar, more image and embed controls, and fixes for plugins, menus and hosting.
What changed in EmDash 1.1
- Publishing calendar. Month and Agenda views bring content across collections and languages into one place. You can filter entries and change publishing schedules when your account has permission.
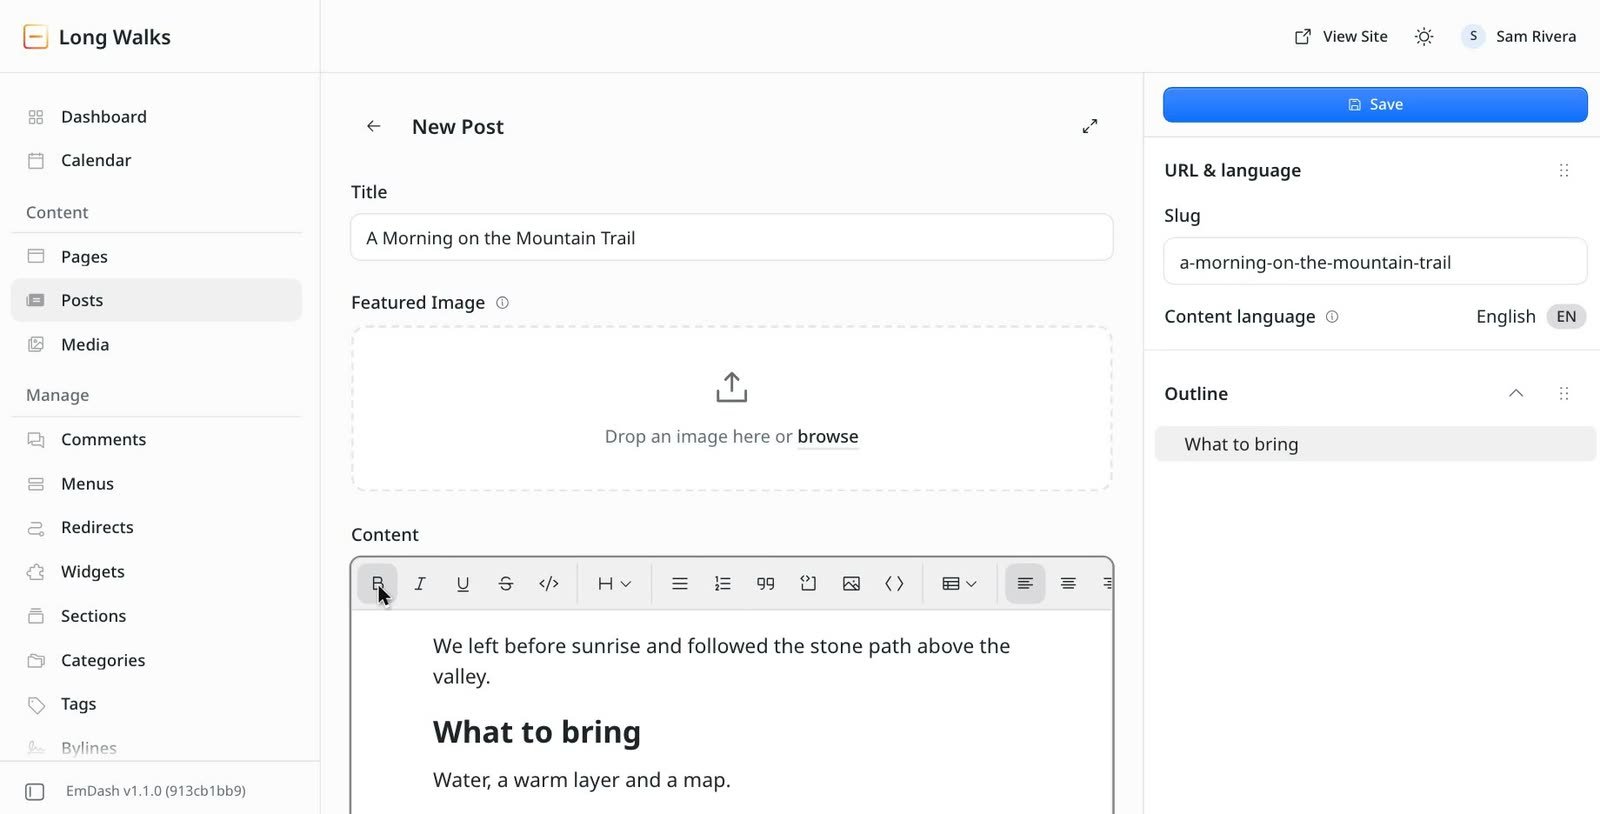
- Images in the editor. Drag images into the text or paste them from the clipboard. A selected-image toolbar includes replacement, alt text, alignment and links, with captions edited below the image.
- Embeds and HTML. The new
/iframeblock embeds HTTPS pages. HTML blocks gain separate CSS and JavaScript fields; new HTML blocks created in the editor default to an isolated frame. - Microsoft sign-in. Sites can configure Microsoft Entra ID as a sign-in provider.
- Plugin fixes. Installed registry plugin settings display the plugin name. Block Kit forms in plugin content editor panels submit their values without reloading the editor.
- Search integration. The optional
WebMcpSearchcomponent lets compatible browsers search public site content and receive titles, links and excerpts. - Hosting and content fixes. Cloudflare setup can record the current HTTPS hostname when no site address is configured. Content lists no longer skip entries when a sorting field is empty, and Turnstile comment-protection secrets are read when the server runs.
See the official 1.1 announcement for the release details.
Menus in 1.1
EmDash 1.1 loads menus and their items in one database query and fixes menu cache updates after imports and site transfers. In the tutorial’s Blog template, open Menus → Primary Navigation, then select Add Content or Add Custom Link to add a navigation item.

Installing plugins from the registry
The registry is a catalog where plugin publishers list their add-ons. Registry installs already existed in EmDash 1.0.1; this guide uses EmDash 1.1.0. Each registry plugin needs a sandbox, a separate environment that limits what its code can access, and a sandbox runner that starts it.
You also need an administrator account with the plugins:manage permission and configured storage for downloaded plugin files. Set up the runner once for your site, then install plugins through the admin.
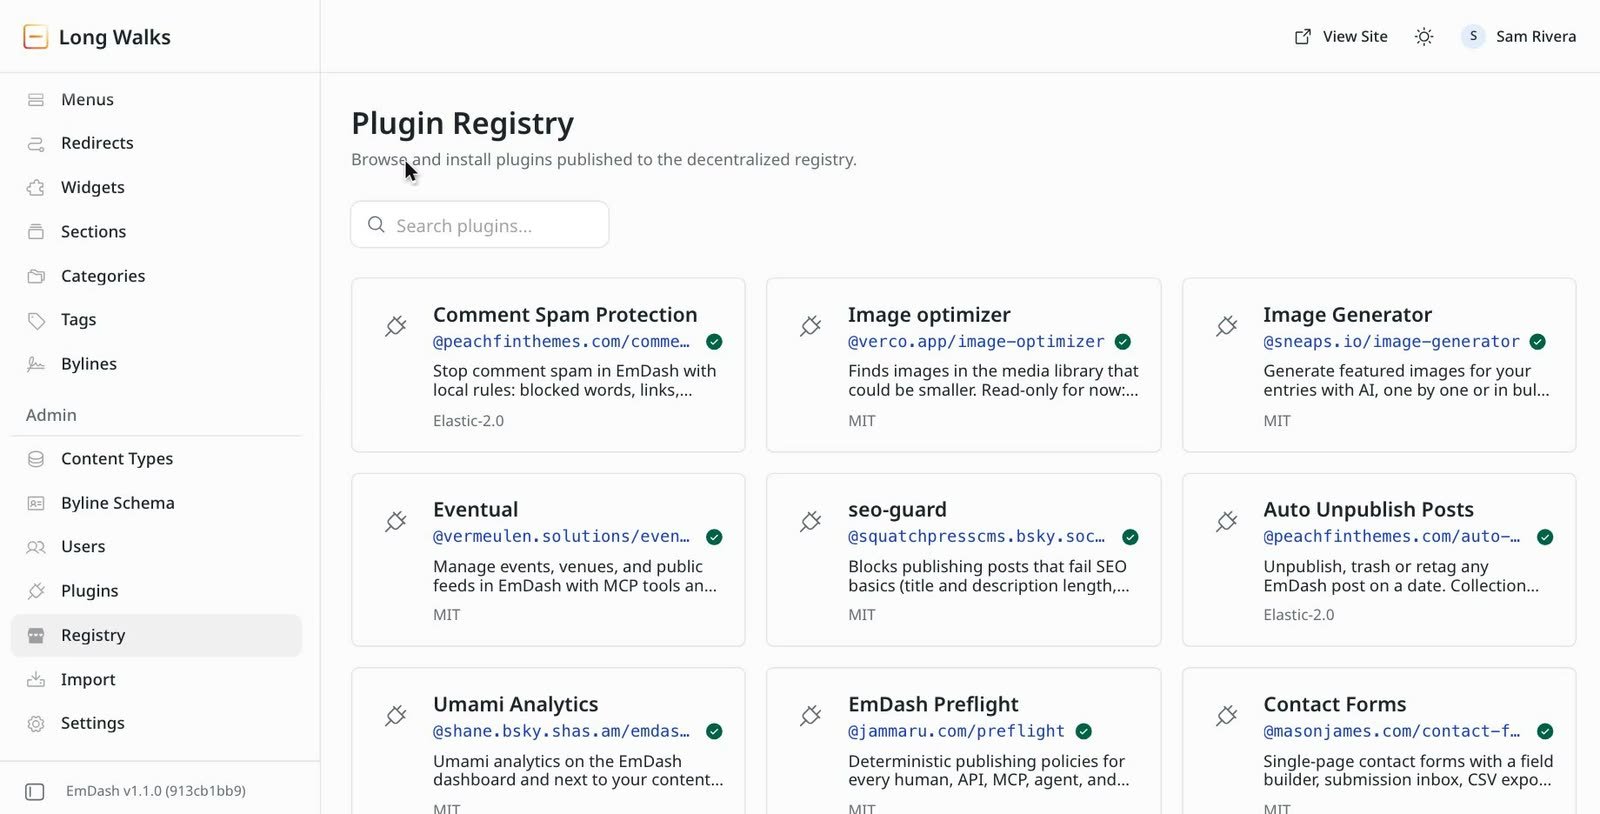
Our tutorial shows how to set up an EmDash 1.1.0 blog and use its admin; the plugin part starts at 4:51 and covers the Node sandbox and installing Comment Spam Protection from the registry.
Set up the sandbox on Node.js
Node.js runs the site on your computer or server. Use Node 22.22.2 or later within Node 22, or Node 24.15.0 or later within Node 24, to satisfy the declared requirements of EmDash 1.1.0 and its registry-verification dependency.
In a terminal opened in your site’s folder, stop the local server with Control+C. Install the runner and its workerd runtime:
npm install @emdash-cms/sandbox-workerd@0.9.2 workerdRunner 0.9.2 depends on EmDash 1.1.0, so keep the runner and core versions matched. Install with optional dependencies enabled on the platform where the server will run; these include the platform-specific runtime binary.
Open astro.config.mjs. Inside the existing emdash({ ... }) options in integrations, add this line and keep the existing database and storage options:
sandboxRunner: "@emdash-cms/sandbox-workerd/sandbox",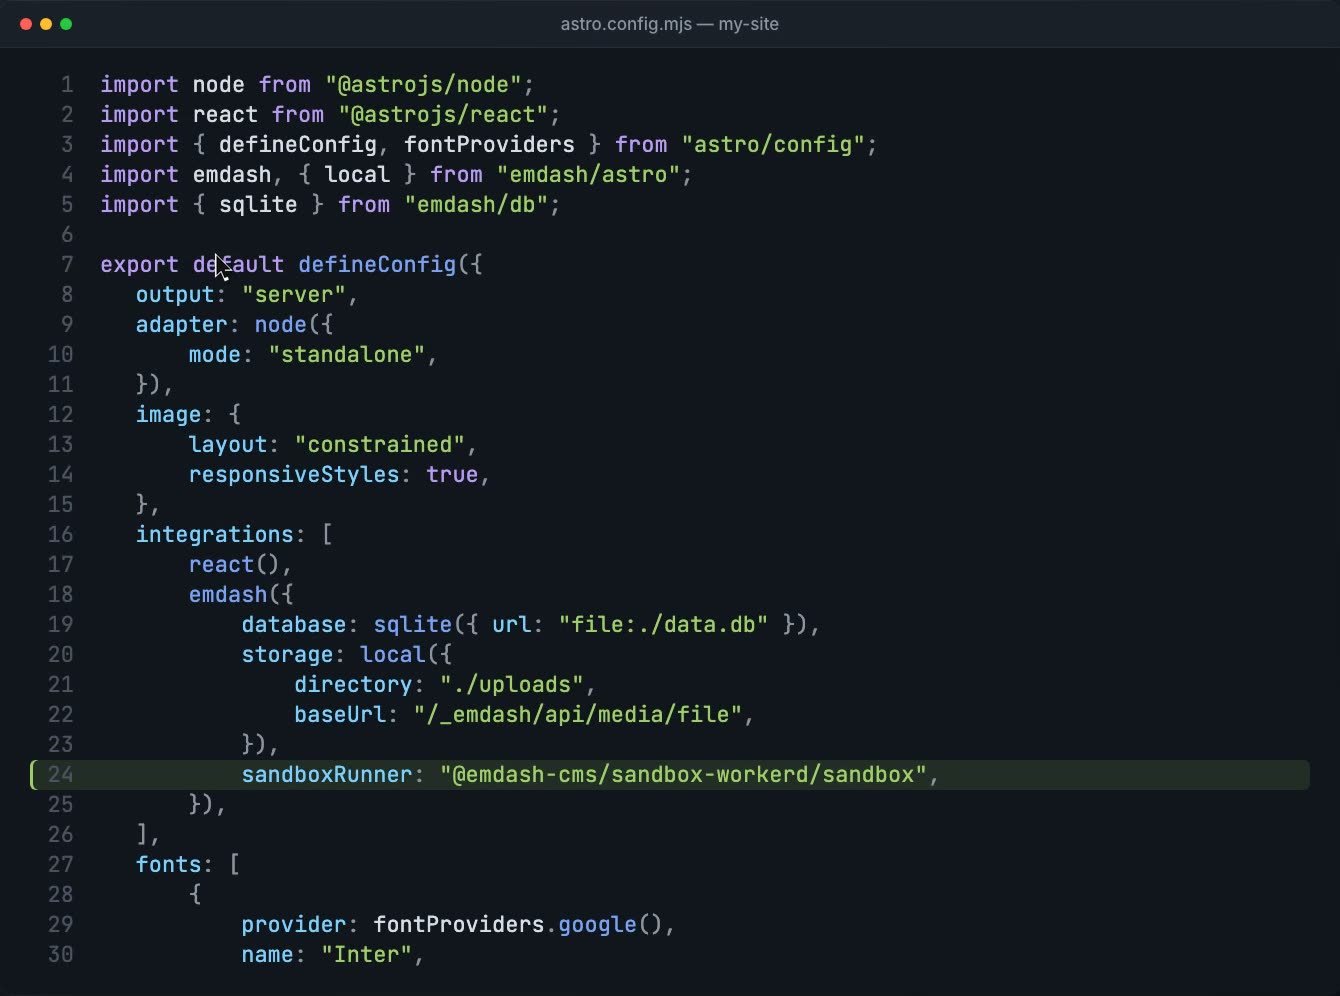
Save the file and restart the local site:
npm run devUse the same runner configuration on your Node host, then rebuild and restart the hosted site. The sandbox guide includes runtime requirements and troubleshooting.
Set up the sandbox on Cloudflare
Cloudflare uses a Worker Loader binding named LOADER. A binding connects a named Cloudflare resource to your site’s Worker, the program that serves requests. Worker Loader requires the Workers Paid plan.
In wrangler.jsonc, enable the template’s commented worker_loaders entry, or add this property inside the existing configuration object:
"worker_loaders": [{ "binding": "LOADER" }]In your Astro configuration, include sandbox in the imports from @emdash-cms/cloudflare and add sandboxRunner: sandbox() inside the existing emdash({ ... }) options. The site must have a D1 database binding named DB; sandboxed plugins are unavailable with Hyperdrive.
The Worker entry file must export PluginBridge from @emdash-cms/cloudflare/worker, and Wrangler’s main must point to that file. The Cloudflare templates already include the export. For a custom entry file, keep its existing request and scheduled handlers and add:
export { PluginBridge } from "@emdash-cms/cloudflare/worker";If the entry file is src/worker.ts, the Wrangler property is:
"main": "./src/worker.ts"Named Cloudflare environments each need their own LOADER binding and CLOUDFLARE_ENV set during the build. Rebuild and deploy after changing the configuration. Follow the Cloudflare sandbox instructions for the complete configuration.
Choose a plugin and accept its permissions
- Open your site’s
/_emdash/adminaddress and sign in as an administrator. - Open Registry, search for the plugin name and open its details.
- Choose a release, read its publisher, verification status and requested permissions, then select Install.
- In the Review Verified Plugin dialog, read the permissions and any public-route notice. Select Accept & Install to confirm.
- Open Plugins to find the installed plugin and its configuration.

Upgrading from EmDash 1.0.x
These steps apply to the stable 1.0.1 release. The npm package numbered 1.0.0 was published by mistake from older code; sites using it should follow the upgrade-to-v1 guide for the broader migration.
Back up your database and media before updating, and keep a separate copy of your encryption key. Check the Node versions on your build machine and Node server against the requirements above. Package updates leave your copied templates, layouts and configuration files in place.
For an npm project on Node, install the exact release:
npm install emdash@1.1.0For an npm project on Cloudflare, update both packages together:
npm install emdash@1.1.0 @emdash-cms/cloudflare@1.1.0If your Node site already uses the sandbox runner, update it to the matching version:
npm install @emdash-cms/sandbox-workerd@0.9.2 workerdUpdate any plugin packages according to their compatibility requirements. Build the site, then start it locally:
npm run build
npm run dev
Open /_emdash/admin and check your content, media, menus and plugins. The build creates the migration manifest for the installed version. In the default automatic mode, EmDash applies required database changes on startup or the first request. Sites using check or manual migration mode need the deployment migration step described in the core database migration guide.
If comments use Turnstile, supply EMDASH_TURNSTILE_SECRET_KEY or TURNSTILE_SECRET_KEY to the running server. On Node, this command loads values from .env:
node --env-file=.env ./dist/server/entry.mjsRotate any Turnstile secret exposed in an older build. When the local checks pass, deploy the new build through your host and check sign-in, publishing, uploads, scheduled tasks and sandboxed plugins again. See the update guide for deployment and recovery instructions.
Using EmDash with a Peachfin Astro theme
Every Peachfin Astro theme uses plain Markdown files by default. Each download includes EMDASH.md with instructions for switching the same theme to EmDash 1.1.0 on Node or Cloudflare Workers.

Open a terminal in the extracted theme folder. Install its dependencies, then switch to EmDash on Node:
npm install
npm run emdash:setup
npm run dev
Leave the development server running. In a second terminal in the same folder, open the local admin:
npm run adminThe setup command installs EmDash 1.1.0 and configures the theme’s content source. On Node, it also loads the collections and sample content; on Cloudflare, the first admin visit loads them. Plain setup leaves the plugin sandbox off. To include the Node sandbox, use this setup command instead, or run it later on the same Node copy:
npm run emdash:setup -- --sandboxFor Cloudflare, use this setup command instead of the Node command:
npm run emdash:setup -- --target cloudflareTo include the Cloudflare sandbox and its paid Worker Loader binding, use:
npm run emdash:setup -- --target cloudflare --sandboxAfter Cloudflare setup, run npm run dev and open a second terminal for npm run admin. The theme supplies the Cloudflare runner configuration and Worker entry file. Follow its EMDASH.md for hosting; an EmDash site needs a Node server or Cloudflare Workers.
Switch back to Markdown
npm run emdash:revertThis restores the theme’s Markdown content source. It keeps your EmDash database and uploads, but does not export EmDash edits into Markdown; the Markdown files remain as they were before setup. If you edited a file that setup replaced, use the instructions in EMDASH.md before reverting.
Our EmDash plugins
Both Peachfin plugins are free to install from the registry and have optional Pro licenses. Use EmDash 1.1.0 with the plugin sandbox configured as described above.
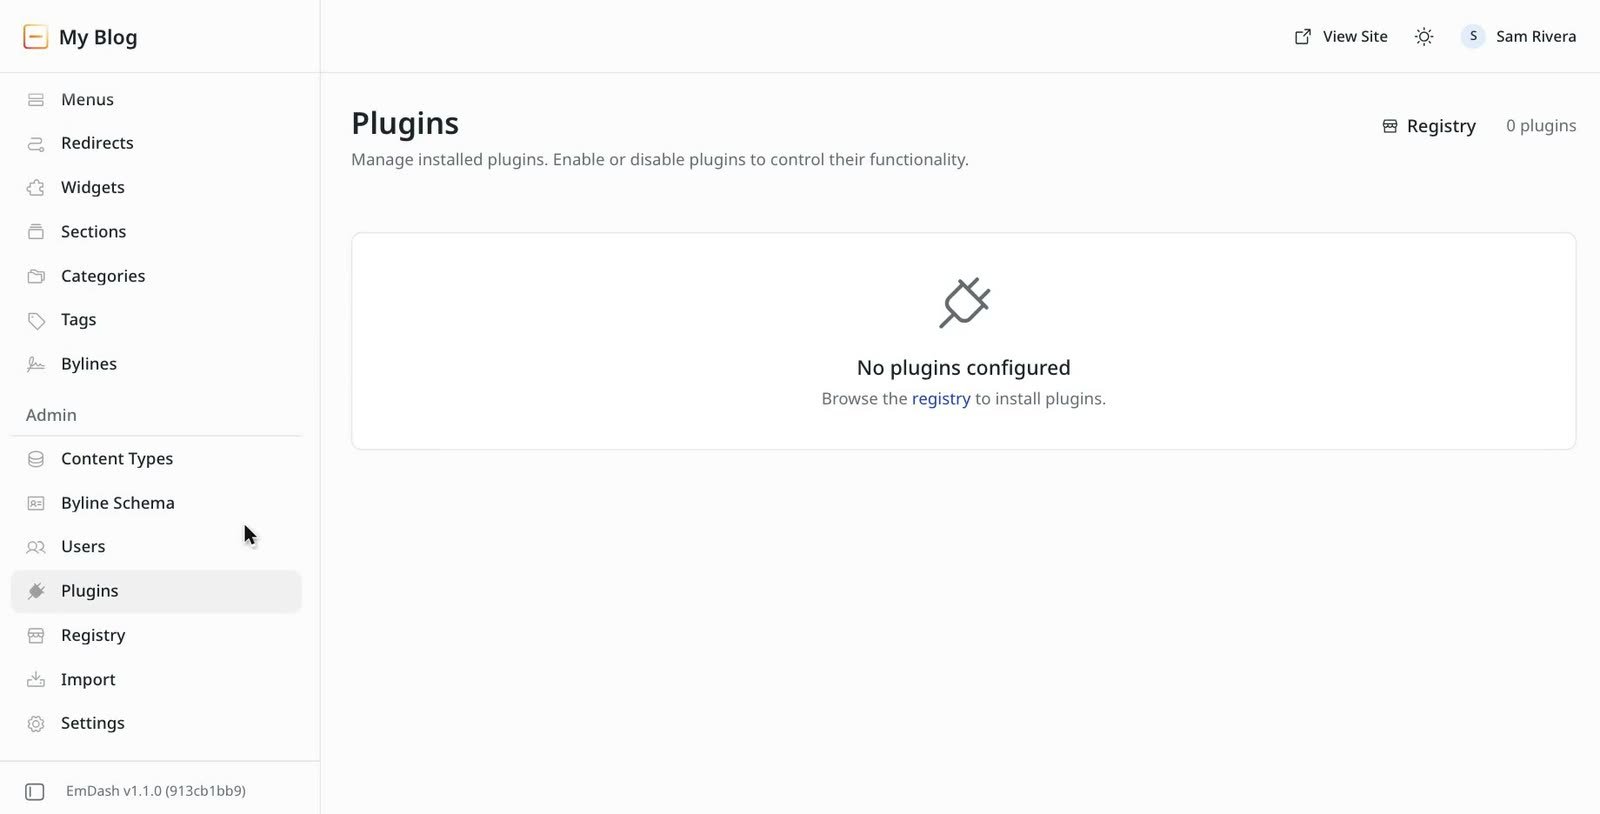
Comment Spam Protection
Comment Spam Protection checks new comments against your rules for blocked words, links, language, duplicates and posting frequency, and records the reason for each decision. Checks run on your site without an outside service or API key.
In Registry, search for Comment Spam Protection and complete the permission steps above. If comments are off, open the collection under Content Types and turn on Enable comments. Open Comment rules → Content to add a blocked phrase, save it, then use Try a comment to check a sample without posting it.
Auto Unpublish Posts
Auto Unpublish Posts schedules an entry to unpublish, move to the trash or change its tags on a chosen date. It also provides collection defaults, a list of upcoming changes and a run log.
Search for Auto Unpublish Posts in Registry and accept its permissions. Open a saved post and use the Scheduled changes sidebar panel to choose an action and date, then confirm.
The Astro Pass
The Astro Pass costs $99 USD once and includes 40 Astro themes. Every theme works with Markdown or optional EmDash CMS, and every download includes EMDASH.md.
